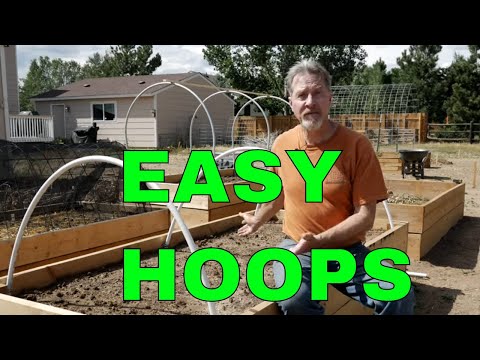
If you’re a gardener with raised beds then you need hoops on those raised beds. And today I’m going to show you four easy and inexpensive methods for making hoops for your raised beds. Hi, I’m Gardener Scott. And I use hoops a lot in my garden and I think you can benefit from using hoops as well.
The idea behind hoops is that you have the hoop that supports some type of material over your plants. Like behind me… these hoops are supporting this shade cloth. Because i’m trying to keep the sun from frying these tender cool season plants. So I’m using hoops to support the shade cloth. You can use hoops to support bird netting over your plants so that rabbits and birds don’t eat your crops.
You can use hoops to create row covers over your plants in early spring to help warm them up and keep some harmful insects away. You can use hoops to support plastic during the spring and fall when it gets too cold the plastic will warm up the area underneath your hoops. They serve a number of great purposes.
And today I’m going to show you how to make four different types of hoop systems, using four different types of material. I’ll make the first hoops using this 1/2 inch black poly tubing. It’s very affordable. It’s very easy to work with. And it can actually do very well in your garden.
It can’t support a lot of weight. So these hoops are ideal for lightweight fabrics, like for row covers or for bird netting. The tubing is really quite easy to cut. I’ll often use my utility knife to cut right through it. Any other sharp knife would work as well. But if you don’t like working with knives, I love this tool.
This is a tube and pipe cutter. And I’ll actually put a link to this below. All you do is just slide it over the tubing and then start squeezing the handle, and it comes off in one piece with no danger of cutting yourself. With these poly tube hoops cut, now it’s time to put them in the bed.
And they need to be anchored so that they don’t flop around. There’s a couple different methods that I use. Now, with this poly tubing, it’s small enough that you could just sink the ends into the soil, depending on how wide your bed is. But I prefer to use something a little more substantial.
So I’ve attached tube straps to both ends and the middle on each side of this raised bed. This works really well if you’re using wooden raised beds. You just put the strap in place and you screw it to the wood. Now, I’m using 3/4 inch tube straps becuase that gives me the flexibility of the 1/2 inch poly tubing, all the way up to 3/4 inch PVC, which I’ll be showing you in just a second.
We begin by placing one end of the hoop into the strap and then we place the other end in the strap on the other side. And now we have the first hoop. This five-foot length gives me a low hoop that’s only about 16 inches above the soil level. It’s ideal for low growing plants. So for strawberries, if you want to put a birdnetting over to keep birds out, this is the size that probably works best for you.
If you want a long row cover in the spring, this size works well because the seedlings don’t need a big cover over them. In just a few minutes I’ve cut these hoops and they’re in place. Total cost for this system, for this bed, is less than five dollars. The poly tubing works great for very lightweight covers.
For something more substantial, you might want to consider moving into PVC. This is 1/2 inch schedule 40 PVC. And it’s string enough to support hail cloth, shade cloth, and plastic. I’ll be cutting these into six-foot lengths. They come in a 10-foot length. Just like the black poly we’ll put one end in a strap and then we’ll bend it to the other side.
And even though this is much more rigid it actually bends very easily. We’ll slide it in place. And now we’ve got these PVC hoops all ready to go. The six-foot 1/2 inch PVC tubes give me hoops that are about 24 inches above the surface of the soil. But for a bed where you might have taller plants, like tomatoes toward the end of the season, or maybe beans that you want to protect with layers of plastic before the cold weather comes, you might want to go with the 3/4 inch PVC schedule 40.
And I use a slightly different method for these in particular to mount them to the bed. I’m using rebar. And this is 24-inch rebar. But that’s only because I’ve got such deep beds. If you’ve got shallow beds, 12 -inch rebar works just as well. You just pound the rebar into the ground as far apart as you want the hoops to be and then when it comes time to place the hoops, you just put the tube over the rebar.
Now, this 3/4 inch PVC is 10 feet long. I’m not cutting it. I’m leaving it at its full length. And then I just bend it and slide it over the rebar. These PVC hoops are about 50 inches above the level of the soil. The height does make them a little floppy. So you’ll need some type of support to keep it pretty rigid.
And what I use is this 1 x 2 fir strip. And I’ll place one on the outside of one side, one on the outside of the other side, and then one across the top. And these fir strips will hold the whole structure in place. When you cover it with plastic, in particular, it can withstand a lot of wind, snow, and do a great job of protecting plants underneath.
But there are some concerns that some gardeners have with using PVC. It will break down in the sunlight. It doesn’t last forever. Though it does last for a number of years. If you’re concerned about PVC breaking down in your garden, or that you’re going to have to replace it after a few years, that leads us to the third option for hoops, which is using metal conduit.
This is what I’ve grown to prefer when it comes to the high hoops. I don’t use the PVC very often any more. I use these metal conduits. This is what they use in home construction to run electrical wires through. It’s 3/4 inch. It’s steel. The problem is you can’t just put it in place and bend it like you can with the PVC.
You need to have a special jig. Now, I bought a jig. I found it at Johnny’s Seeds. And that’s what I used to bend this conduit into a hoop. There are different size jigs depending on the width of the hoop that you want to make. I mount it to one of my raised beds. This strap right here is where we’ll put one end of the conduit and then we’ll bend it around to get a four-foot wide hoop.
Which is the size of my beds. With the 18 inch mark in the strap, I begin the bend just using leverage… just… put a nice bend in it. And then I’ll slide it forward a little bit more, continue the bend, and then I like to take it out when it gets to about the halfway point, put it in to the 18 inch mark that I put on the other end.
I’m trying to keep it as level as possible. Start the bend in this direction. Put it forward. And when it’s done, I’ve got a four-foot wide hoop. You mount the metal hoops just like the PVC. By just sliding the ends over the rebar. These are much stronger and not as wobbly as the PVC. But they do cost a little more than twice as much.
The high 3/4 inch PVC hoops are about $10 for the entire set up. For these metal conduits it’s a little bit closer to $20 and that can include the cost of the rebar. To make it completely sturdy I will use the same 8-ft long 1 x 2 fir strip. And I just take twine and wrap it around. It doesn’t necessarily need to be screwed in place.
You can use clamps, but I find the twine works just as well. My favorite hoop system is this one. It’s made with cattle panels. And surprisingly it actually is less expensive than the metal conduit. I think it’s stronger. It’s easier to put in place. And it lasts almost forever. However, it is more difficult to use because it comes in 16-foot lengths.
So unless you have a truck or a trailer it’s difficult to transport it. If you can use a cattle panel, here’s how I do it. I lay out the panel in its full 16-ft length and then I measure six feet. And that’s where I make my first cut. Using bolt cutters, I just snip through all of this heavy gauge steel.
And I end up with the six-foot length. Then I need to bend it into a hoop. It does take quite a bit of strength. It’s not hard, but you need to put one end on the ground and then use your whole body to bend it. And I do this in a couple sequences. First the middle. And then the sides to try to get as much of a curve as possible.
Once the hoops are done it’s a simple matter of putting them in place and then covering with whatever material you’re using like I am with this shade cloth. I also like this particular size. Remember we did the PVC in the 6-ft lengths as well. It’s only about two feet above the surface of the soil.
And so I can use it as a trellis for some plants that want to grow through it. That’s double purpose for the cattle panel. The type of hoop that you choose to make can be metal or plastic, whatever height you want. It all comes down to the purpose. I use different hoops for different purposes. The idea is just to cover the plants at different times of the year for the best success.
These high hoops really work well later in the season. These low hoops work better early in the season. And the middle size hoops, well, I use them throughout the entire growing season. If you’ve used hoops and you have any recommendations, please let me know below, or any questions, I’d like to hear those as well.
If you would like to see more of these gardening videos, well then subscribe to the Gardener Scott channel, if you haven’t already done so, and be sure to click on the bell so you know when new videos are coming out. If you like this video, well then give me a thumbs up, and share it. I’m Gardener Scott.
Enjoy gardening.