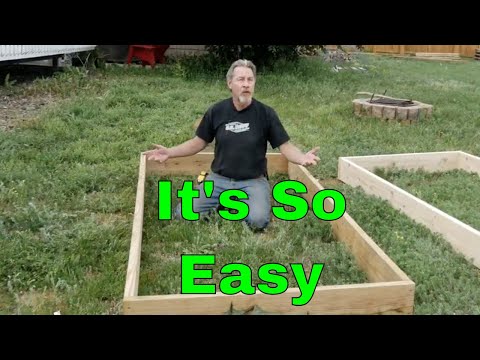
Raised bed gardening is my preferred method for vegetable gardening and it’s using a raised bed like this, which is easy to put together and not very expensive. Today I’m starting the first of my raised beds for my new garden. So join me as I show you how I make raised beds. Hi, I’m Gardener Scott.
Making these raised beds is about as easy as it gets. All we’re trying to do is just make a four-sided box. I’m using some lumber that I purchased this morning at one of the home improvement centers down the street, but you could easily use recycled lumber and I have some of that around the corner that I’ll be making into a longer bed.
One of the great things that makes it so easy if you buy it from one of the big-box stores is they’ll cut it for you if you just ask. And so the basic design comes down to three boards. Two of those boards we’ll leave as is for the length and then we’ll cut the third board in half to become the sides.
And it’s that simple. One cut gives us a box with the sides half as long as the length. So, what does that mean in actual measurements. Well, I’m using eight-foot long boards. So if I take that third board and cut it in half, I now have two 4-foot boards. When I put those pieces together I will have a raised bed that is four feet on the width and eight feet on the length.
That’s a perfect-sized raised bed. And you see a lot of gardeners recommending a four-foot wide bed because that gives you the opportunity to lean into the bed from both sides and easily work it. If you have a ten-foot board, well, you could do the same thing and cut it in half and now make a bed that’s five feet wide by 10 feet long.
But I think that five feet is a little bit too far to be reaching in unless you can access it from both sides. So eight foot boards are the ideal length. And now what I’ll do is measure one of these boards, find that halfway point and then cut it. Now we have the four sides to our box to begin our raised bed.
And the next step is to screw the pieces together. For the easiest and the simplest box, I’m simply going to screw these boards together at the corners. I am using an exterior grade screw and this is a three-inch long screw. These two by eights that I’m using are actually about an inch and a half thick.
So by using a three-inch screw the first inch and a half is in the board and the second inch and a half is actually what grabs into that second board to hold it all together. With an exterior grade screw at three inches this is likely to hold together for a long time. You can screw these together any way you choose but I do think it’s slightly important in deciding how you place the boards, which one is on the outside that you actually screw through.
Now if you think about this bed being complete and soil in it, particularly as you stack these and have a higher raised bed, there’s a lot of weight pressing down and pushing out and it’s actually going to push out on this long side more than this short side. And I’ve seen beds that begin to bow in the middle.
Well because this long section is really the weakest part that tends to bow. That means this corner joint of the long section will have a tendency to pull out and the screw over time when the boards start to dry can actually pull out of that board that you’ve grabbed into. To help overcome that tendency, I think it’s important to actually screw from the side piece into the long piece so that you’re not pulling the screw out.
You’re actually using the strength of the screw laterally to hold the bed in position. So with the boards lined up the way I want them, trying to keep the tops level, I’ll just place a screw at the edge of the board going in about half way. And then I’ll complete this process. I like to do two.
You can also do three, lining up the bottoms now and I’ll do the second screw in. This corner is done and now I’ll move on to the other three. So with all four corners screwed together this bed is ready to go. And you can stop here and this is strong enough to fill with soil and start growing plants in your garden.
One of the nice things about this basic design is that, as I alluded to earlier, they’re stackable. So you can make these raised beds as high as you want them to be. And I’ve gone ahead and made an identical sized bed that I’m going to stack on top of this one so that it’s double height.
I do have rabbits. And so most of my raised beds are going to need to be high enough to try to keep the rabbits out. So the next step when you’re building higher with multiple layers is to start thinking about the bracing at the corners to hold the boxes together. To brace the corners together I’ll be using these four by fours that I cut to fit in the corner.
Now the height of these two two by eights together is actually 15 inches and I’ve cut this bracing to 14 inches. You don’t really need it to go all the way to the top and all the way to the bottom. So I have an extra half an inch at the top and an extra half an inch at the bottom that is just open space.
And now we’ll screw through both boards into this 4×4 to give it superior strength. On this part of the box that has the two screws holding the basic box together I’ll add a third screw to bite into the 4×4. And I’ll do the same with the box below And then to this side where there aren’t currently any screws holding the basic box together I’ll do two in each level into the four by four.
And now this box, in this corner, is about as strong as it gets. And I’ll repeat this process on the other three corners. The construction of the bed is complete and it is sturdy. Two people can carry it anywhere in the garden for placement. And it’s really easy to set up an assembly line process if you’ve got more than just one person.
Someone could cut, someone can screw, a couple others can carry them into position, if you’re making multiple beds. It’s strong. These corners are not going to come apart any time soon. So you can expect a bed like this to last for years. You may have noticed the two different colors of woods.
Let’s talk about the wood right now. This top layer is basic fir that I get at my home improvement store. It’s the cheapest level of wood. It is rated as an interior wood so it will dry out a little bit faster and it will decompose, rot, a little bit faster than other woods, but because it’s on the top of the bed I’m not that concerned about it because this top will tend to stay drier than the bottom.
And this bottom? Well, that is treated wood. And I know there’s lots of discussion and lots of argument about whether you should use treated wood in your garden setting. Well, they’re not using arsenic in the chemicals anymore. And what I’ve read says the treated wood tends to be pretty safe and really doesn’t affect the plants.
I do have a minor concern and that’s why I put it on the bottom because most of the plants I’m growing in these beds are going to have pretty shallow roots. So the roots are not going to extend down to this depth. I like the treated wood because it’s less likely to decay. It’s less likely to have that water damage.
So by being on the bottom it’s going to last longer than a wood like this, if I put it on the bottom. Now, you can use redwood, which will last much longer than the top one in particular, but it’s definitely more expensive some cases almost three times more expensive than a basic fir like this.
So I can replace these upper boards three times and just about recoup the cost of redwood. I don’t have cedar readily available in my area, but that’s another viable option if you’ve got access to cedar lumber. It is also not going to rot as quickly and can handle the exposure to the wet conditions better.
If you choose to go with the fir or pine option for your beds I would consider using a wood preserver before you put the soil in. That will extend the life of the wood. As far as how high these beds are, there’s really very little limitation. As long as you’ve got that strong corner, you can continue stacking these beds.
These are two by eights. I could easily use two by twelves stacked two high, or stacked three high. A lot of it depends on how you garden, or who’s doing the gardening. For the Galileo garden I had beds of all sizes. For students in wheelchairs I built beds that were about two to two-and-a-half feet high so they could access them easily.
For senior citizens I built beds that were three feet, three and a half feet high so that they could garden without having to get down on their knees and that could easily reach into the beds. But for kids I just do a single layer because for them this height is a disadvantage and they like to get down on their knees and work in the bed.
It’s totally up to you. The cost of the bed really comes down to what type of wood you choose. If you get it new, a bed like this is less than $50. For the bed that I’m going to be making for some of the other areas of my garden the only cost is the screws… pennies… because I’m using reclaimed wood.
It’s totally up to what you can get your hands on. If you have any comments or questions about making raised beds, please let me know below. If you’d like to see more of these videos in the gardening series, well, then subscribe to the Gardener Scott channel and click the bell, so you know when a new video comes along.