Today I’ll discuss how to make your own potting soil and seed starter mix, and I’ll share my recipes. For many gardeners one bag of seed starter mix or potting soil is enough to start a few seeds or to pot up a few plants, but if you plan to do a lot, a lot of flats of seeds or maybe transplanting a lot of plants, you’re going to need a lot of bags and that can get expensive real fast.
You can save money and I recommend making your own if you’re going to be doing a lot. If you look at the ingredients of your seed starter mix or your potting soil you’ll find that they almost always rely on peat moss and my recipes do the same. Perlite and vermiculite are also very common ingredients.
You can find these at most nursery centers. I tend to buy in bulk. These 4-cubic foot bags really don’t cost much more than about $20, if you buy them online and they’ll last a long time. A seed starter mix really doesn’t need to include much in the way of nutrients. You don’t need fertilizers at all.
A seed contains everything it needs to start growing. All you need to do is just provide a place that’s warm, that has moisture, and the seed will start growing and so the medium can really be quite simple. Peat moss and perlite Is all I use. So my basic mix is two parts peat moss to one part perlite.
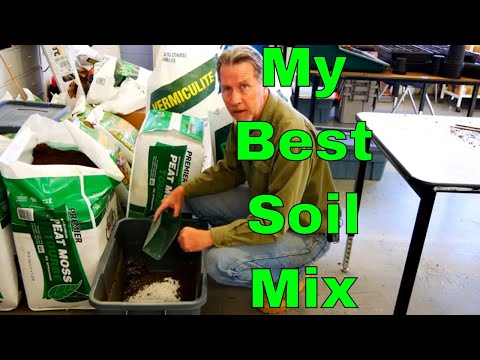
A simple matter, just dump in two scoops of peat moss and one scoop of perlite. Now the perlite can be quite powdery and it will actually drift up into the air, so if you do this a lot, and you’re making a big mix, you might want to wear a dust mask. I typically will stand up when I put the perlite in so that as it drops the dust will kind of settle low.
And I let the dust settle before I get back and start mixing it, but for demonstration purposes Ii’s just a simple matter of 2 to 1. Now, you can keep track, so I can go 1 2, 3, 4, 1, 2, Whatever works for you. And the measurements don’t have to be perfect, they don’t have to be exact.
When I’m making a lot like this tub, I’ll actually forego these specific measurements and I’ll just dump in a bunch of peat moss and then I’ll take the bag of perlite and I’ll try to put in about half as much. And that’s it at this point. I just mix it by hand, just trying to combine the two ingredients so that it’s pretty evenly distributed.
Adding water is the last step. The peat moss is pretty dry and you’ll need to add water to make the entire mix nice and moist. So what’s so great about this magical mixture of just peat moss and perlite? Well you want your seeds to stay moist so that they can germinate. That’s where the peat moss comes in.
It has an ability to hold and retain a great amount of water. And so the seeds have a nice place where the roots can start growing in a moist environment, but you don’t want your seed mix to be too wet because the seeds could rot. That’s where the perlite comes in. It’s great at drainage, so the mix between the moisture holding contents of the peat moss and the drainage ability of the perlite, actually is pretty magical and they work very well together.
There is an alternative to peat moss you could use coir. Coir is made from the husks of coconuts and typically comes in a compressed brick or block. This is an alternative. It achieves the same purpose that holds a great amount of water. You do need to rehydrate these bricks before you could use them to make a seed starter mix or a potting mix, but it’s definitely an alternative and some that I sometimes use.
It’s just the coir tends to be more expensive than the same amount of peat moss. When it’s time to transplant seedlings into a bigger pot, a seed starter mix doesn’t have much in the way of nutrients that plants need, so it’s time to use a potting mix. A potting mix is a little more substantial, little more robust, has more nutrients, and so you can either buy a potting mix or make your own.
But you do need to have more than just peat moss and perlite. The key difference between the seed starter mix and the potting soil mix is the addition of compost. I use bag compost. It works better for me in this environment with the quantities that I make. You could also use your own compost. I’d recommend sifting it.
You could use worm castings. The idea is just to add a nutrition component at this point to the mix and give yourself, your plants, something that they can benefit from. At this point I start adding the three ingredients to my tub. The ratio changes. I use three parts of peat moss, three parts of compost, two parts of perlite.
I put them in my tub and start mixing. Additional nutrients in the potting soil mix comes from blood meal, bone meal, and green sand. The blood meal offers the plants nitrogen, the bone meal provides phosphorus, and the green sand provides potassium. For a tub this size I’ll add about a quarter cup of the blood meal, the bone meal, and the green sand and then incorporate it very well.
If you’re making a smaller quantity you don’t need nearly that much. It doesn’t take much more than maybe a tablespoon of each of these ingredients are or at least one of these ingredients to make your potting soil more robust and more substantial. Just like before, when you have everything in your tub or your container, you want to blend it and mix it well to fully incorporate all of the ingredients.
So where does the vermiculite fit in? Well, vermiculite and perlite are similar. Perlite helps with drainage and vermiculite helps with drainage, but vermiculite also has the ability to hold some moisture and so sometimes in my seed starter mix I’ll actually use vermiculite along with the perlite in the recipe.
In the potting soil mix I’ll do the same thing. I’ll use three parts of peat moss, three parts of compost, one part of perlite, and one part of vermiculite. And there you have it. That’s how I make my seed starter mix and how I make my potting soil mix. The exact ratios aren’t critical.
And if you do a search of the net you’ll find that there’s a lot of recipes out there. These recipes work for me. I’ve had great success I encourage that you try the basic recipes, modify them as you see fit and basically come down to what you like best. Ultimately you’ll save money.
You might enjoy yourself and you have some fun, just making your own soil for your own seeds and your own plants. Thanks for reading this article today.